
PROJECT 1
May 2002
RESTORING A NUMBER 2 CLOCKWORK MOTOR
I recently acquired a #2 clockwork motor in bad condition.
Rusted, but otherwise mechanically sound.
Here are some tips I found from recent practical experience with refurbishing mine.
Take your time disassembling the motor!
First I loosened the screws furthest from the spring.
I pulled apart the plates slightly. This allowed the gears to fall out of the motor with a bit of wriggling.
Once all the small gears were out, I undid the rest of the screws.
I lifted off the top plate while sliding a flat screwdriver over the spring to stop it "Springing" up and out.
Once the top plate was off, I thought I could tie up the spring.
I think I could have tried tying it up then, but impatience became the better of me (and trying to hold down the screwdriver while fiddling around), so I pulled up on the main gear shaft and it did uncoil quite violently.
I suppose with all small components taken out one does not have to worry about anything flying away into the carpet to get eaten by the vacuum cleaner later!
You see the problem with tying it up was that the spring was relaxed against the retaining posts and it became impossible to squeeze anything between the posts and spring (I was trying to use masking tape).
Perhaps with someone helping a long cable tie could have been squeezed in and fastened?
I cleaned all the gears and loose parts with detergent. Be careful some detergents can discolor some
paints.
I cleaned the plates in caustic soda and sanded the plates with fine sandpaper
to remove the rust stains. Fine Glass paper with water is best, as it leaves no
scouring.
I masked off the brass parts on the plates and control levers using fine
scissors to cut masking tape to the required size and shape.
I sprayed the plates with a metal primer.
Mine was originally navy blue, so I sprayed it with 2 coats.
I found Navy blue spray paint (Plascon) at my local hardware store (Home Warehouse). It dries a bit darker that the original navy blue, but is quite acceptable.
All spraying (primer + 2 coats) was left to dry for at least 6 hours between sprays to get best results.
Assembly was painful.
The best and easiest was is to mount all gears and main spring in the one plate flat on a table.
When assembling, I tried winding the spring by hand and keeping it wound with masking tape. This sort of worked, but when you tried inserting it into the plate or let go, the spring wound "spring" out sideways ending up looking like a birds nest.
This happened once or twice so I gave that up.
To get it back in the spring has to be left uncoiled and straightened.
By this I mean the main spring is in place, but the coil is left pulled out like an extended yoyo string.
Place the second plate over and align all gears in position.
Tighten up all the screws.
Wind up the motor.
This will pull the spring in like winding in a fishing reel.
The end will clip in to the mounting post.
Voila!
It was frightfully frustrating putting it back together.
It took me a 3-hour non-stop session just to put it back together, but the results were worth the
effort.


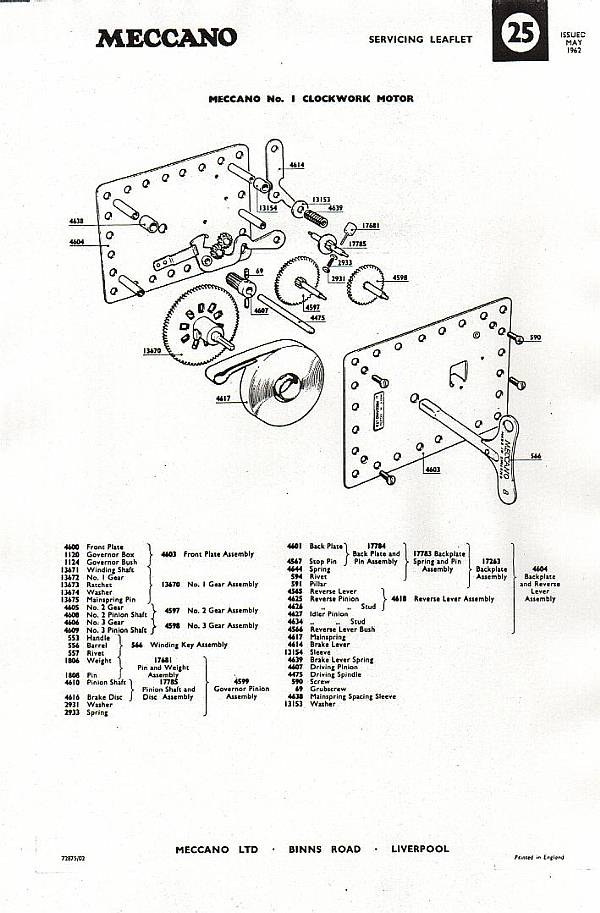
A No.1 service leaflet, giving an idea of the internals of the No.1 & 2 clockwork motors