PROJECT 2
July 2002 - October 2002
I saw a model of a Sports car at http://www.schraube-und-mutter.de/ built in 1930's blue and gold and I decided to try and recreate it.
Thanks to Paul Wright from the Transvaal Meccano Guild who gave me lots of advice which worked well !
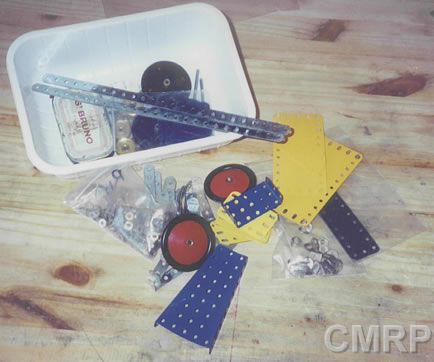
Here are all the parts before starting.
STRIPPING
I started by stripping the paint off of the plates and wheels with caustic soda.
The stuff eats everything, so I used eye protective goggles and dishwashing gloves.
I mixed about 10 Tablespoons caustic soda with 3 Liters of hot water in a plastic bucket.
I dropped the parts in and
left them for about 2 hours.
The
paint just falls off and I lightly scrubbed the stubborn pieces with a toothbrush. If
the paint was stubborn, I just left it for longer in the bucket
until it was easy to rub off.
I
rinsed the cleaned parts in running water and dried them straight away.
The
zinc coated parts I left in a solution of 50% hydrochloric acid and 50% water.
I
left them to soak for about 4 hours and then scrubbed and rinsed the parts as above.
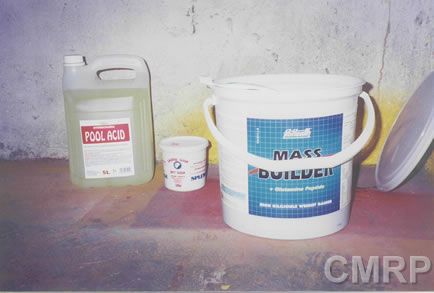
The Hydrochloric acid and Caustic soda.
I cleaned the screws and rods in a 50% dishwashing liquid and 50% Cream of tartar solution in hot water. I could not find the tartaric acid that was recommended, but I am told that Cream of tartar in the same stuff, different name.
I put the brass
screws, nuts, washers etc into a jam jar with the solution.
I agitated the
jar for about 1/2 an hour while staring at the TV.
I changed the
solution about 3 times and it really did a good job of cleaning up the screws.
The rods I had to give a rub with a cloth and they shined up quite nicely. I
think next time I am going to make a tumbler to rotate the jar automatically.
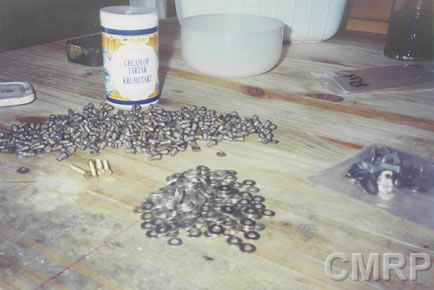
The "Cream of Tartar" used to clean the brass screws.
PAINTING
I sprayed all the parts to be painted with a gray metal primer. I masked off the brass bosses on the wheels and pulleys with masking tape.
To spray the strips and plates, I hammered pin nails into a board and hung the parts off the pins to spray.
Once the primer was dry, I sprayed the wheel disks, pulleys, and bush wheel post office red from spray cans.
The wheel rims were sprayed with off-white paint.
Next the gold parts.
I discovered that with for some odd reason, the gold paint applied
rather thick to the strips and ran terribly (it could be something to do with a
heavy hand and being in a rush) !!
I ended up having to re-strip all of
the gold parts and redo from scratch!
I retried with a number of very light sprays and
they came out fine.
Next I sprayed a coat of clear lacquer over
the gold parts to smooth them out and try to give them an original look. The
gold paint on its own seems to leave a bit of a rough finish.
A lot of hard lessons were learnt in this project. The freshly sprayed red parts were nearby when I sprayed the gold. The red parts ended up having a fine gold dusting over them. I also had to re-strip, re-mask, re-prime and re-spray them.
I now only spray one color at a time, wait for the parts to dry enough to move out the room and then I spray with the next color.
Next the plates.
I bought a number of different shades and makes of
blue to try to match the deep cobalt blue of the original.
This
has been very frustrating as none of the colors would match.
It is a very difficult color to match. Eventually I
took a sample to a paint expert who mixed up a 1/2 liter for me.
The blue turned out too light. I tried another paint expert who got it right.
I bought a model spray gun to spray the plates. It was fairly cheap and uses compressed air in cans to spray.
I mixed the paint with 40% paint thinners so that the gun will be able to spray the paint easily.
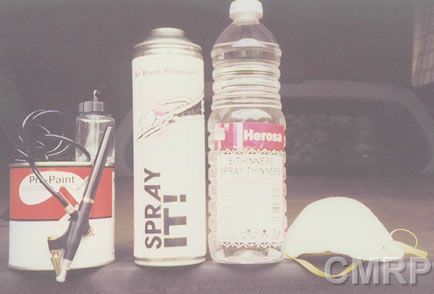
From the left. The model spray gun, compressed air and spray gun paint thinners.
Luckily the paint expert matched the blue quite nicely and I was pleased with the result.
I tried baking one of the plates to see if the color changed, and unfortunately it darkened very noticeably.
I decided not to bake the plates.
DRAWING
I bought a gold pen with a 0.8mm hard fiber tip from an arts and crafts store. The sales lady told me that the paint in the pen is enamel based and would be fine to use with other enamel paints.
Paul gave me the suggestion of placing a strip of masking tape to the underside of the ruler , approx 1mm away from the edge to that as you draw the lines on the plates, the ruler won't smudge the lines and the paint won't be compelled to run under the ruler (capillary action).
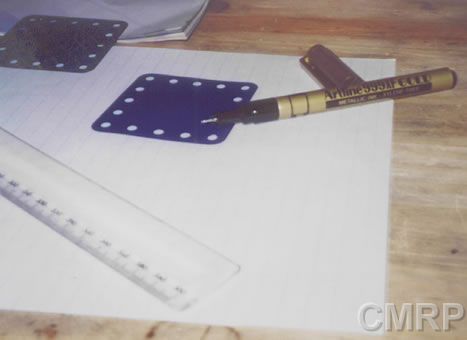
Clever trick ! You can just see the masking tape on the far edge of the ruler.
It was faster and easier than I expected to draw the lines, although it did become quite tedious. I drew the first set of parallel lines, left the plate to dry and then finished the other half.
For some reason all the plates came out perfectly first time around, except for the flanged sector plate. I managed to blotch and streak the gold lines. I had to re-strip and re-spay it 3 times before I got it right !
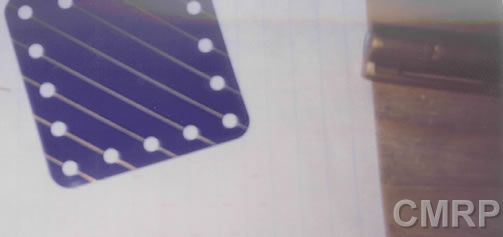
The first set of lines.
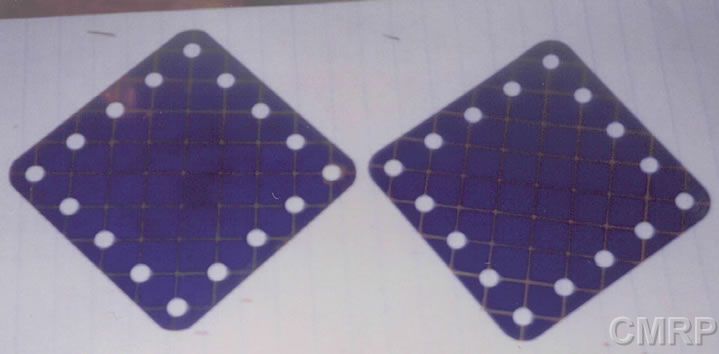
The finished plate. An original is on the left, my repro is on the right.
ASSEMBLING
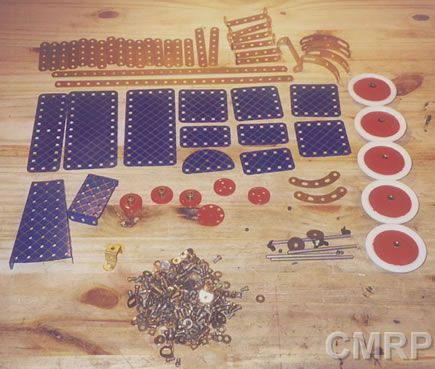
All of the parts finished and ready for assembly.
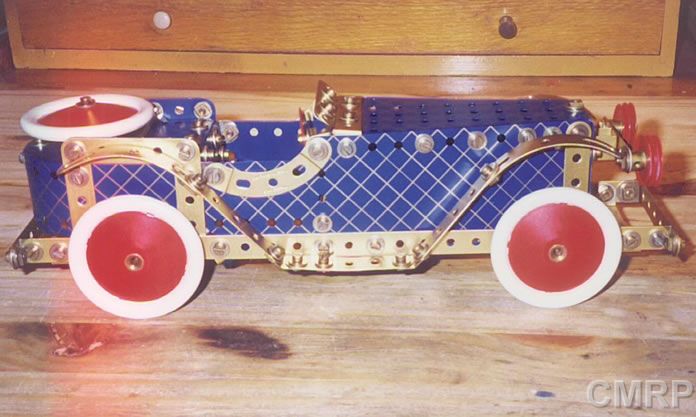
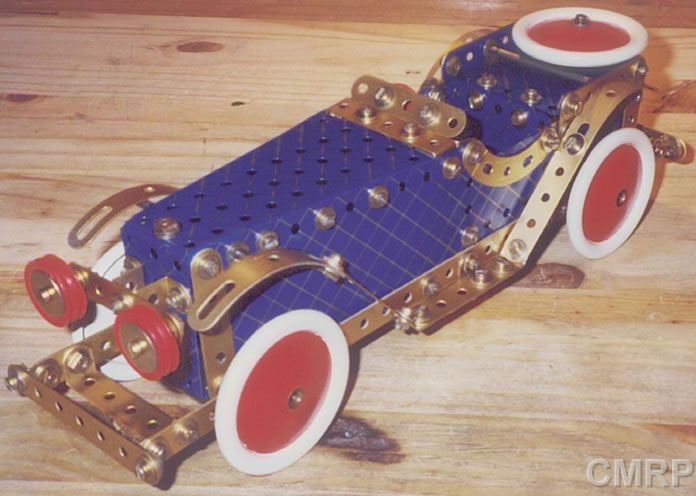
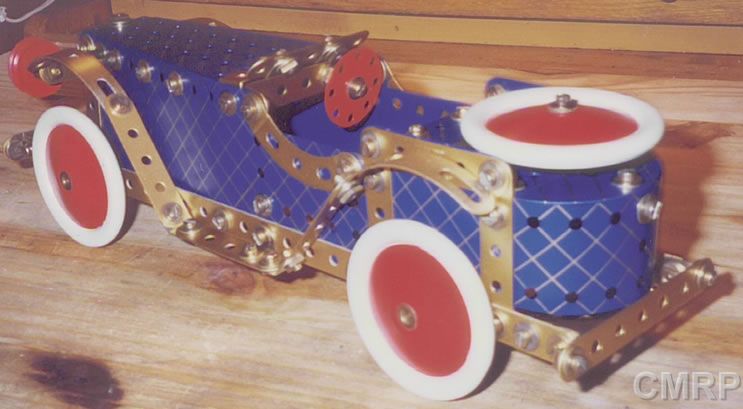
Below are pics of the finished model. This project took ages to complete. Three months, on and off!
Considering the following :
I wasted time trying to match the blue.
I had to purchase a model spray gun, something I was reluctant to do, but now I see the value of having one.
Learning how to spray properly.