
KITCHEN FISH TANK JOURNAL
JEBO 30L TANK
December 2010 – Initial setup.
After much consultation with the “Director of Home Affairs”, I was allowed to setup my Jebo R338 30Litre tank in a corner spot in the Kitchen. I pulled the tank out of Storage and placed it in the agreed corner spot in the Kitchen. I decided that I would like to have it as a planted tank that would impress even Takashi Amano himself :-).
Pump & Heater
First thing I did was install the pump and heater (Aqua H2O 100Watt) in a corner baffle that hides all the equipment. The Prodac CO2 diffuser is hidden in there as well. The baffle is a piece of curved plastic that I siliconed into the corner of the tank. Numerous 4mm Holes are drilled into the baffle to allow the pump to draw water in from the tank. The pump output is to an overhead trickle filter (wet / Dry) built into the cover of the Jebo. The filter material used is filter floss and lava rock. I hammered up a bunch of larger rocks into smaller pieces that would pack nicely into the filter tray. The pump I used is a Resun SP-600, 5w, 260L/h, H/max 0.45m. I have a feeling the flow might be a bit low, but it is what it is for now!
In Position!
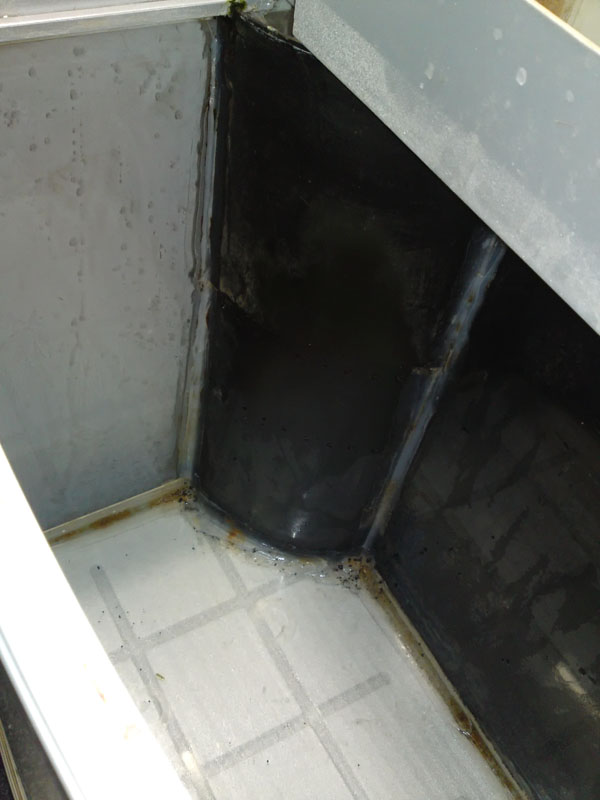
View of the drilled baffle hiding the pump, CO2 diffuser and Heater. The container above is the overhead filter that forms part of the lid of the fishtank.
CO2 System
I purchased a 2Kg fire extinguisher with siphon removed and Solenoid controlled SAGA regulator from Dory Pets. I am not advertising for anybody, but I will mention where I bought all equipment, ferts, hard to find items etc in this journal purely to make it easier to find the stuff, and a way to reference back where I got the stuff. I found the Prodac CO2 diffuser at Hillfox pet shop
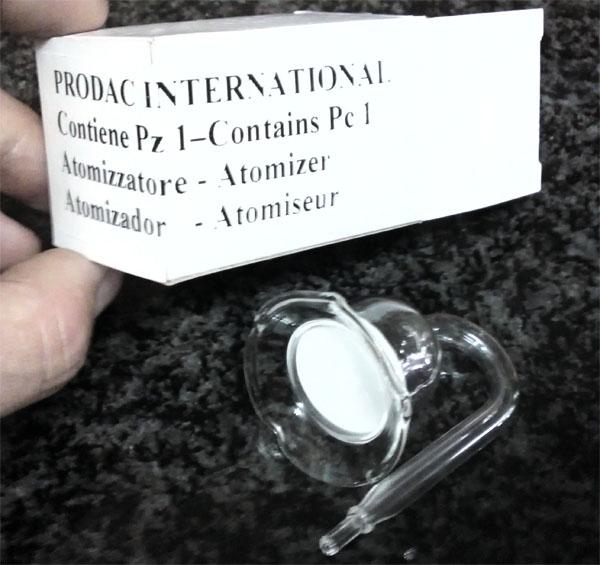
Prodac Co2 diffuser
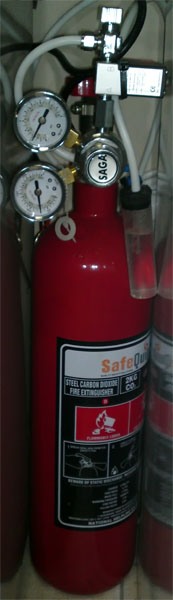
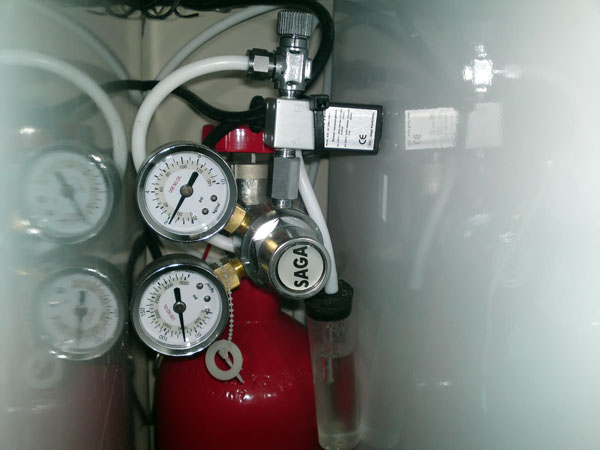
Extinguisher and SAGA regulator
Lighting
The Jebo comes with two mini 7W Fluorescent tubes powered by a magnetic ballast each. I could only find 4000K “Cool white” replacement tubes and after Googling and looking all over Gauteng, I decided to gut out the light hood and install two Philips Tornado 6500K “, 20W compact fluorescent bulbs.
First I drilled out breather holes in the top of the hood. My plan is to install a mini fan on the side of the light hood to extract the heat at a later stage.
I used the Q-Bond product to glue the Screw in fixtures to the inside of the light hood (The one where you pack the powder around the object to fix and apply the superglue). Works great and the ceramic light fixture bonded to the plastic super solid. I cut and installed a Sera light reflector to fit inside the hood. I also installed an LED light that I use as a Morning & Evening Light before and after the main lights come on. It has a suction cup and was easy to install under the feeding lid of the light unit. It emits a very cool looking directional low light beam just before and just after the main lights come on.
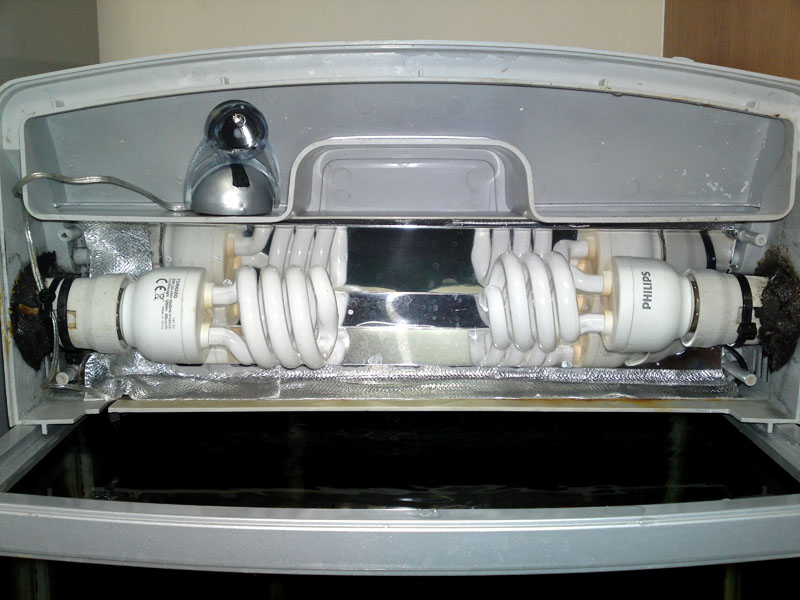
Inside of light hood with Phillips Tornado CF and the LED light
I purchased four timers to control the light and CO2 schedules. There seem to be so many opinions on lighting / CO2 schedules so I use the below and once again, it is what it is.
Auto Timers Schedules :
- Light 1: ON @ 10:00; OFF @ 19:00
- Light 2: ON @ 11:00; OFF @ 20:00
- LED : ON @ 09:00; OFF @ 10:15 AND ON @ 19:45; OFF @ 20:30 (Morning and evening lighting)
- CO2 : ON @ 08:00; OFF @ 20:00
Unfortunately by now I made what I feel was my biggest mistake of the whole project. I had been deliberating what substrate to use and I decided to just use a fine grain 1mm-2mm black quartz substrate (inert) that I had lying around. In went the substrate and water and I went shopping for plants!
I planted some straight and spiral Valisneria, Acorus Pusillus, Lilaeopsis (New Zealand grass plant) and some Java fern. I did weekly 30% water changes and used commercial plant fertilizers with the recommended dosage at water changes only. The CO2 injection had pushed my PH to 6.5 and after 3 weeks I put in Neon Tetras and Coolie Loaches.
The tank ran from December 2011 to March 2011 and the only thing that was growing was the Straight Valisneria. It grew around 9 cm a week. Nothing else seemed to be growing at all, the Spiral Valisneria seemed to be melting and eventually stabilized, but that was it.
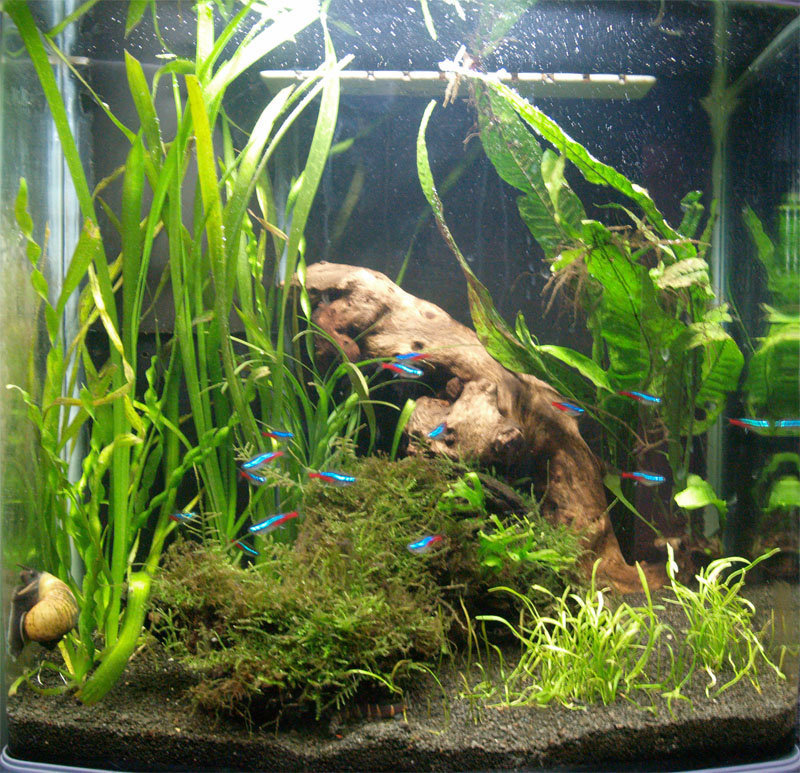
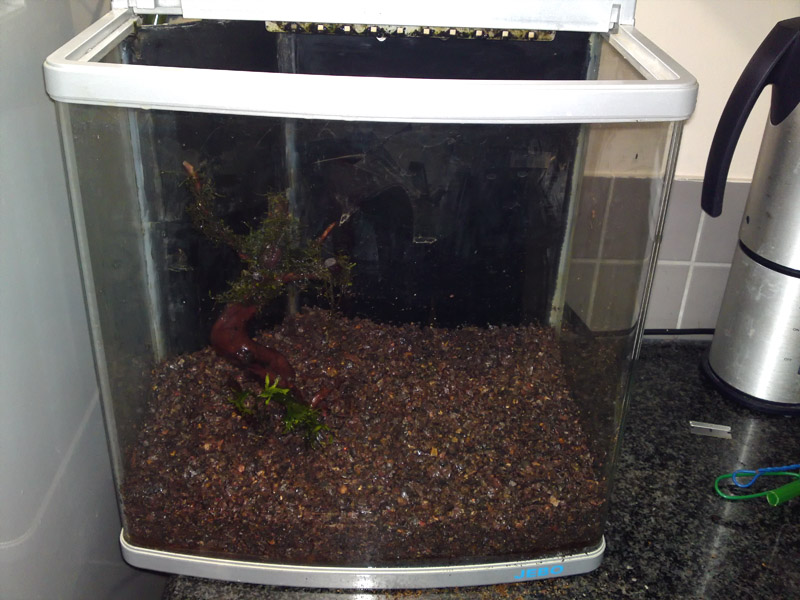
Picture of the tank in January, a month after initial setup
April 2011 - Rebuild
I decided that I obviously have a fertilization problem after looking at other peoples eye popping results on the web with similar setups. There is tons of info and opinions out there on what I wanted to do regarding substrates and EI dosing.
The below is what I did based on what I read and I hope I understood and implemented it properly or at least good enough to get the results I want.
- Ditch the commercial fertilizers and use the Estimative Index (EI).
- Use Volcanic Rock Dust distributed by http://www.turbo-grow.co.za. Minimum bag is a 2.5Kg bag for R35 which I found at Blue Haven nursery opposite Montecasino in Fourways. From what I understand this will provide trace elements in the substrate.
- Replace my substrate using Palm Peat Fiber by Starke Ayres dosed with Chemicult Hydroponic Nutrient Solution. From what I understand this will provide Fertilization in the substrate. Please see article by Professor Dirk Bellstedt that convinced me to try this method (http://www.apsa.co.za/board/index.php?topic=4213.45) The professor also explains below : “ The Palm Peat Fiber is really coconut husk which has been ground up and then compacted into a brick shape. It is not really peat and it does not have the acidity of normal peat which is a very important consideration in soft water aquaria.”
The Chemicult Hydroponic Nutrient Solution by Starke Ayres packaging has been changed from the blue 500g soft pack. It is now Nutrifeed by Starke Ayres in the new resealable softpack.I found this and the Palm Fiber Peat brick at Checkers Fourways.
- Cap the Palm Peat with Seachem Flourite. I wanted to use the regular Flourite but I did not like the lightish shade of the soil. I found Flourite Dark at Petmasters in Benoni. The Seachem website shows the Flourite Dark to have a lower iron content that the regular flourite so I have decided I will push a few iron nails into the substrate as well.

Volcanic Rock Dust

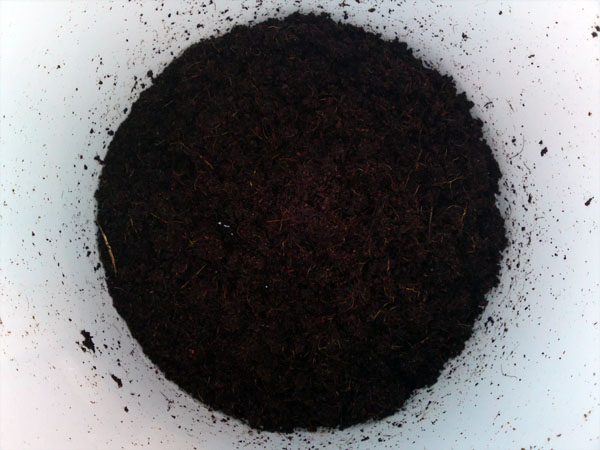
Peat
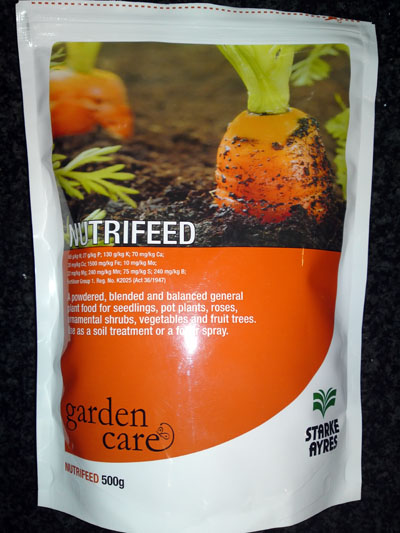
Nutrifeed
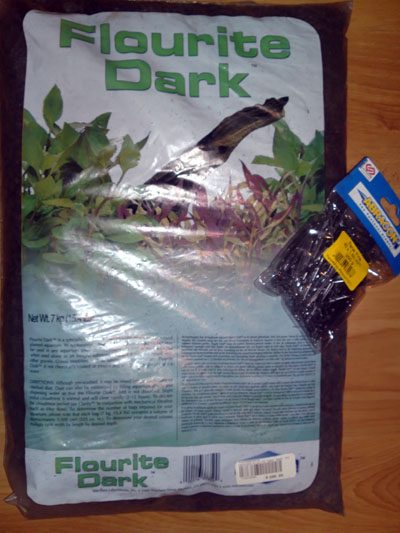
Flourite Dark
Preparation - Prepare Palm Peat Fiber. One heaped teaspoon in five liters of warm water in a bucket and then add the palm fiber peat brick and leave it in overnight. I proportioned this to 1/8 as that would be the volume needed for my tank.
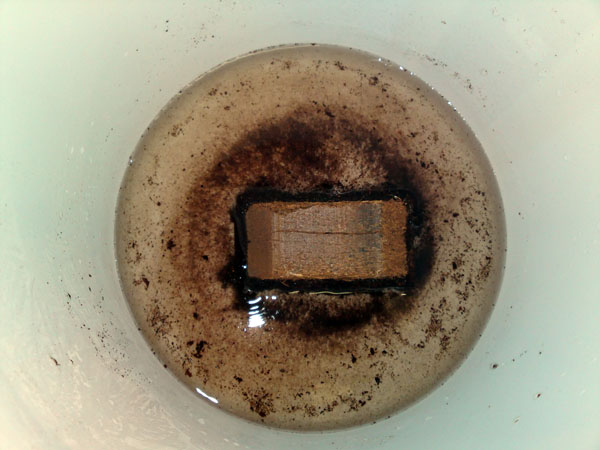
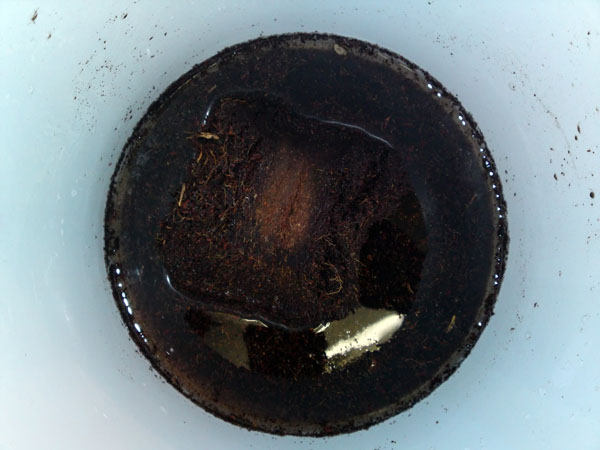
Palm Peat in bucket. The water gets soaked up in minutes.
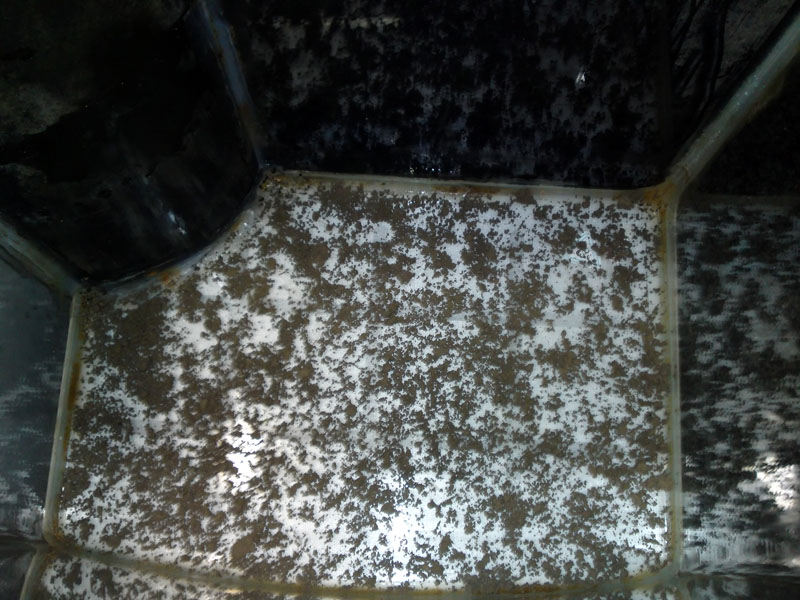
- Wash the Flourite! Reading on the web people warn that you have to thoroughly wash the Flourite of you will have cloudy water for a while.
- Made my “Bonsai Tree”. I shopped around until I found a suitable looking piece of Grape vine and I cut it down to size. I drilled holes in the trunk and pushed in extra pieces into the holes to make extra branches. I drilled and cable tied a rock to the base to keep it in place in the tank.
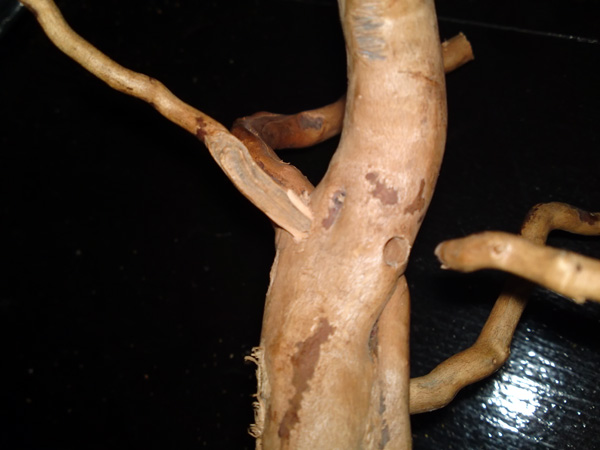
Drill holes to add extra branches!
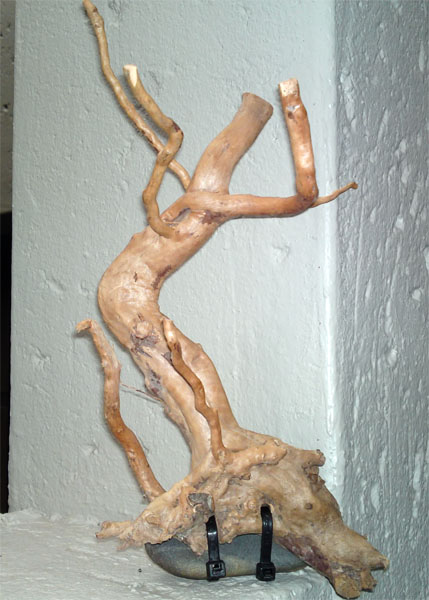
Rock attached to keep the “Tree” in place
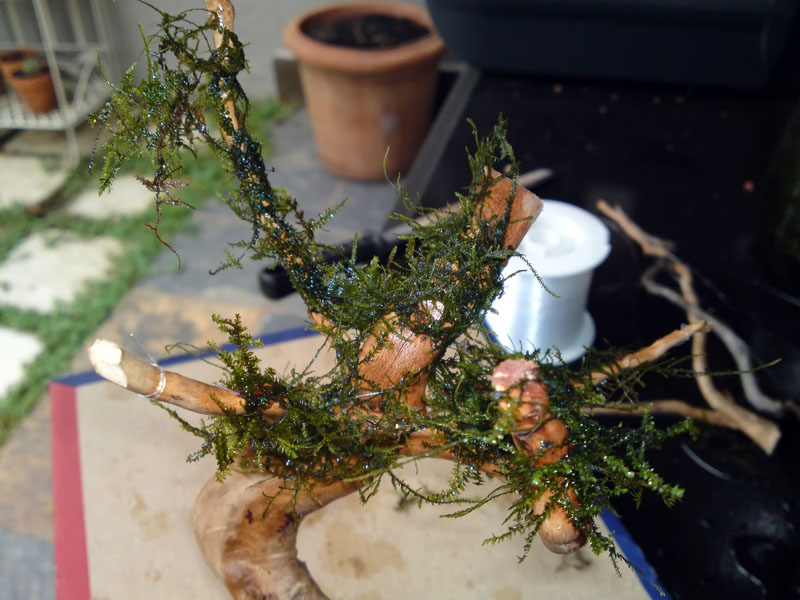
Attach the Java Moss with clear fishing line.
Breakdown
Once ready, I shutdown all electrics and siphoned 10 liters of water from the tank into a bucket to hold the fish (from the surface so that the water would be clear and free of muck). I siphoned more water into a Tupperware to place the lava rock filter media into it to keep it alive. I then removed the plants and then fish into the holding bucket.
After I drained all the water and had removed the old gravel, I sprinkled a fine layer or Volcanic Rock Dust over the bare glass and then placed a 1cm layer of the MENUly prepared PPF. I placed the Bonsai tree where I wanted it and finally I capped the PPF with a 3cm thick layer of Flourite Dark. I also pushed in a few iron nails over evenly spaced intervals in the substrate.
Volcanic Dust Layer
1cm thick PFP Layer and tree in place
3cm thick Flourite Layer
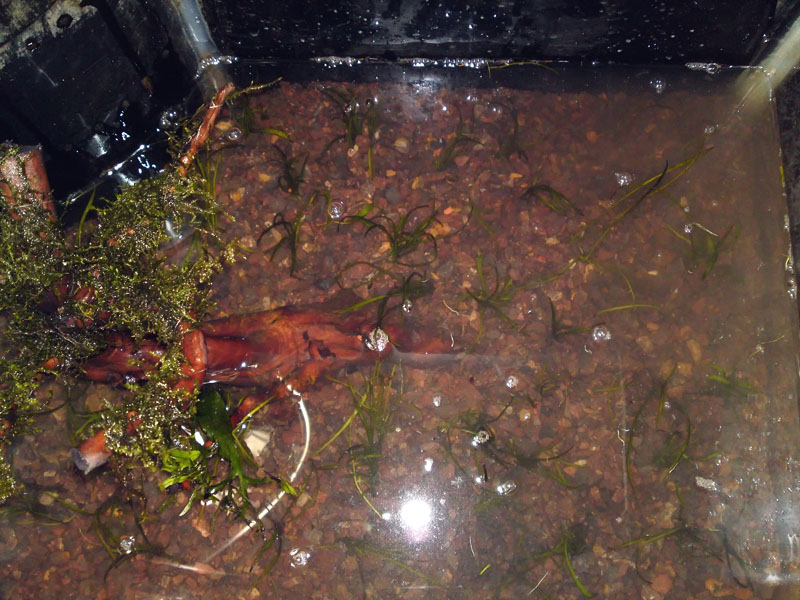
I separated the New Zealand grass plants from into each other into zillions of little plantlets with their own roots and planted them evenly spaced intervals over the entire bottom of the dry tank. The idea is that they will grow out to form a nice grass carpet over the entire bottom.
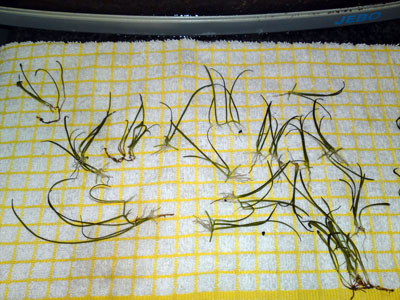
New Zealand grass plants
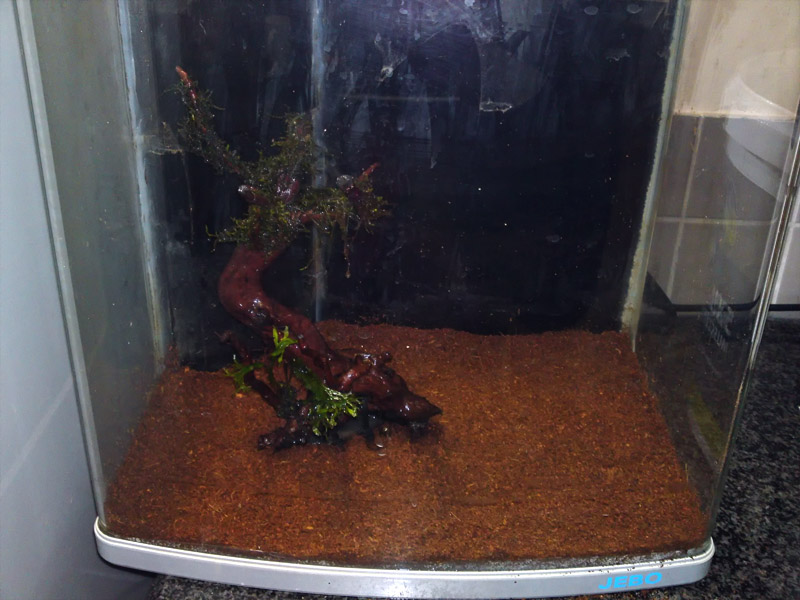
I filled the tank with 20 Liters of fresh dechlorinated water and did a water merge with the fish in the 10 liter bucket. Once I felt that the water was mixed across, I netted the fish back into the tank and topped up the tank. I am pleased with the result and I hope that the plants will grow in well. Below I have added my understanding of the estimative Index and how I am using it in my tank
Redone tank, water was a bit cloudy initially but cleared up in 24 hours as you can see in this picture. Everything is settling in nicely.
Estimative Index
I used the STOCKSOL.xls spreadsheet from the TomBarr Report website to work out my dosages and schedule for my tank. The spreadsheet is great and I worked out my tanks dosing regime from it.
I procured the following substances from the stores below for the EI dosing :
KNO3 - Saltpeter – Clicks Rivonia
KH2PO4 - Lenolax – Clicks Rivonia or Dischem
MgSO4·7H2O - Epson Salts – Clicks Rivonia or Dischem
FE+ & Trace - Trelmix – Rivonia Home Warehouse, Checkers, PnP
CaCO3 – Seachem Equilibrium – Hillfox
KCL - No Salt – Dischem Fourways
I use a medical 2ml and 5ml syringes with blunt needles (From Dischem) to dispense liquids into the tank. I learnt the hard way that it is better to rub the end of the needles across sandpaper to blunt them after I managed to inject 0.002ml (I guess) of dechlorinater into my thumb the one day!
Another trick with the syringes is that the printed markings rub off rather quickly with use, something they were not designed for. I used a blade to run a scratch over each marking so that once the printed markings wear off, the syringe can still be used accurately.
Measuring spoons from checkers make life easier to dose dry ferts.
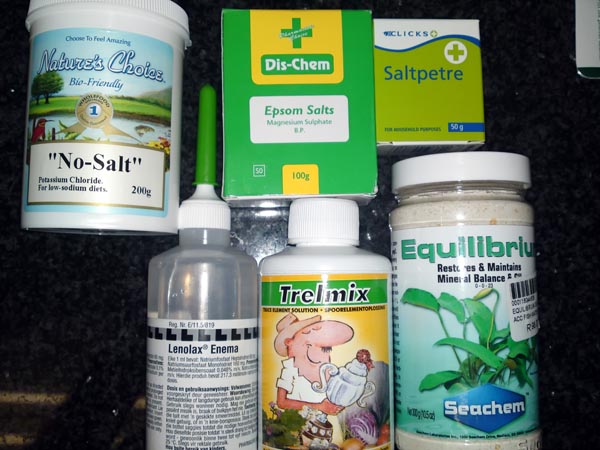
All the ingredients I use for the EI dosing schedule.
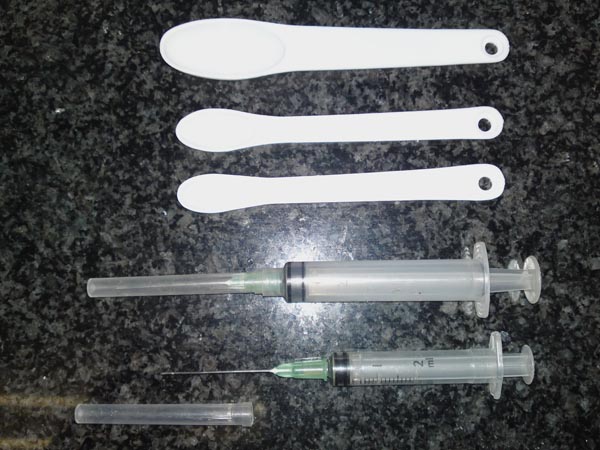
Syringe and spoons used for Dosing
I purchased a license for Aquarix Aquariumsoftware v4 to keep track of my Schedules, Flora and Fauna in the tank. It is a nice product and helps keep track of the schedules for the tank.
That is all for now, I will update pics of the growth progress to see if all of this was worth the effort. Of course it is as we all know ;-)
Progress : July 2011
I left the New Zealand Grass Plant (Lilaeopsis) to spread out over the bottom of the tank.
The problem was that the new plantlets on the runners has very poor to none root growth, as well as the runners running out very close to the surface of the gravel, about 0.5 to 1cm. At the slightest touch huge clumps of the plant would come loose and float above the surface of the gravel. Attempts to push the plants back in ended up in a frustrating excercise to keep other clumps planted and stop the uprooting. It just seemed that no matter how deep I pushed the plant back in, it would eventually come up again. I looked at the suggestion of removing my Coolie Loaches and snails, but decided against it as even during general cleaning, any disruption to the plant ended up in messy clumps of uprooted plant.
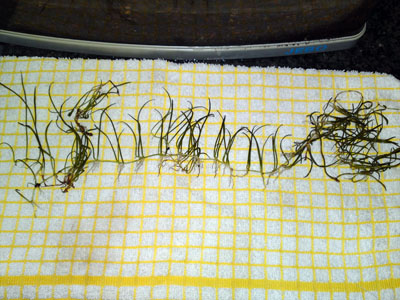
In the photo below, a string of plantlets on a runners showed no additional root growth for the past 2 months. All new plant growth seemed to stay stunted and show poor root growth. Root growth was never more than 0.5cm.
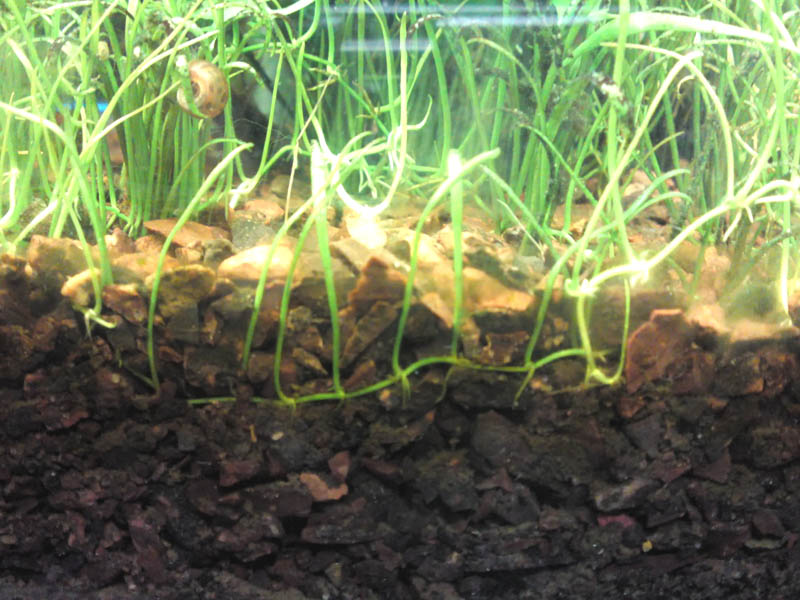
This string of plantlets showed no root growth for the past 2 months.
I read that the Dwarf Hairgrass (Elocharis) will grow well under most conditions and can be invasive, growing into all corners of the tank. That is what I wanted so I decided to pull up the Newzealand grass plant and plant Dwarf Hairgrass in its place. I left a small patch of the NZGP in the left corner but it is doing as badly as ever. The Dwarf Hairgrass has shown great root growth of up to 3 cm and is spreading nicely.
I also planted some Hygrophila Difformis (Water Wisteria) at the back as well as planting a Microsorum pteropus (Windelov´s Fern) at the base of the tree stump. The plant is a modified Java Fern, presenting triple-split edges on each leaf, which gives it a beautiful and dense bushy aspect as it grows. A really nice plant.
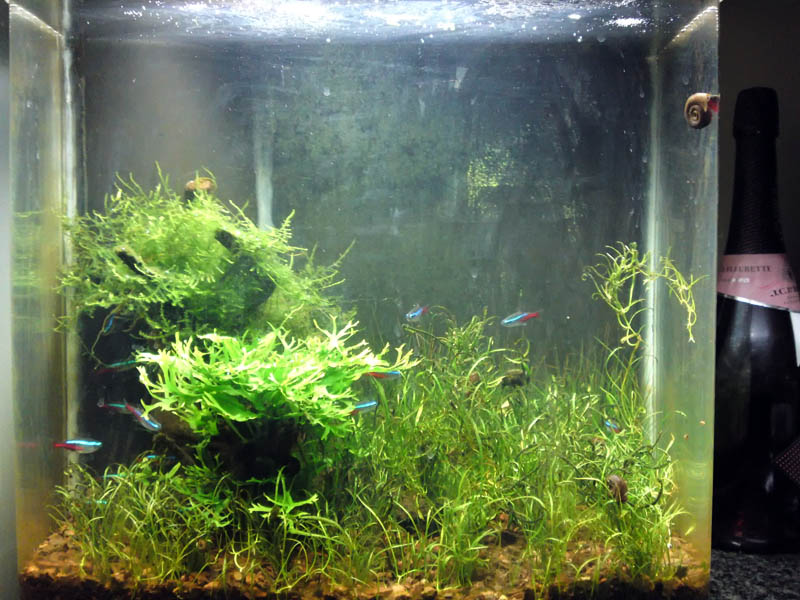
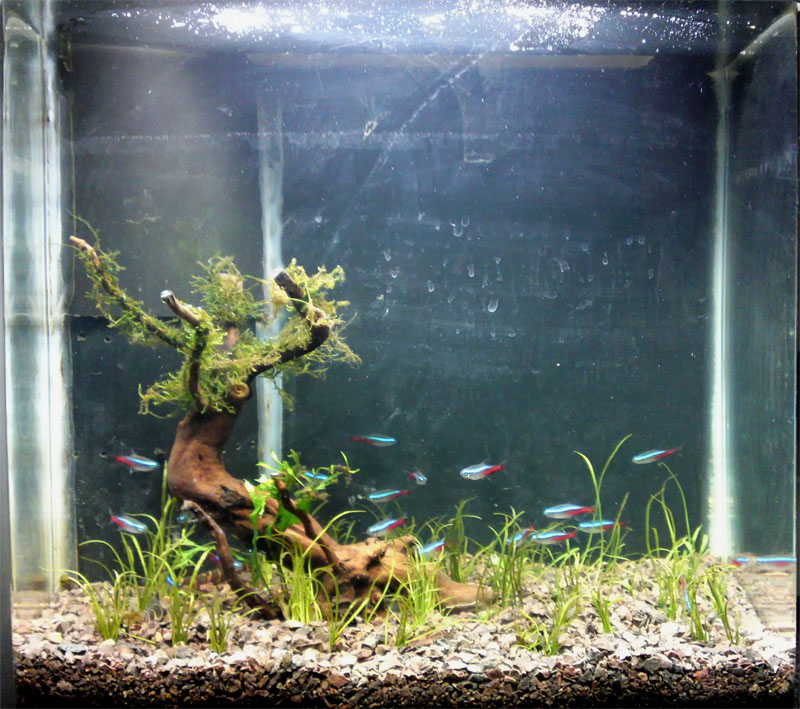
View of the tank the middle of June with the NewZealand Grass Plant doing badly and looking scruffy.
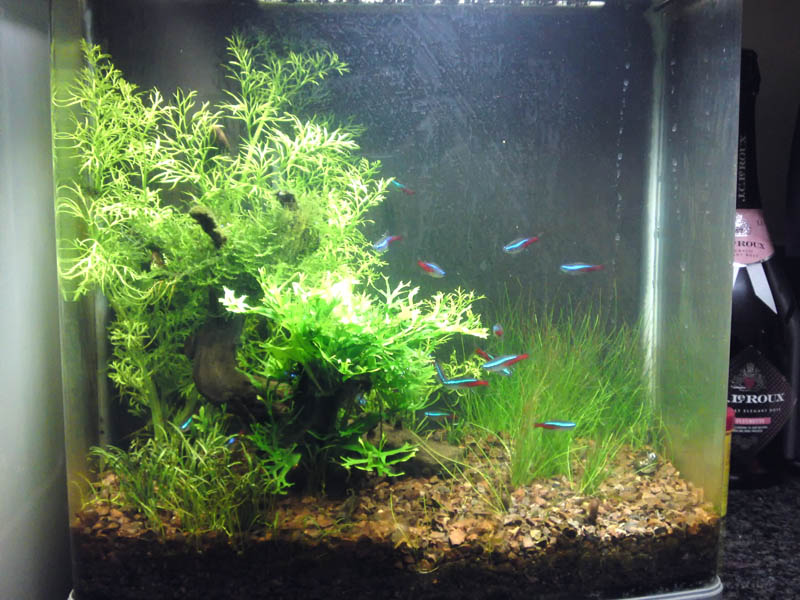
Tank Mid July with the Hair Grass Plant after one months growth.
It has been one month since adding the Hygrophila and Hairgrass and I am much happier with the tank. The Tetras seem more secure with the additional cover offered by the Hygrophila and the tank just looks better. The tank has matured and there is minimal algae growth in the tank and on the plants.