PROJECT 4
September 2002
REPAIRING AND RESTORING A 1970'S MAMOD MINOR 2 STEAM ENGINE
Stripping, cleaning and repainting
This project was done with kind advice from John O'Rear of Model steam
engines. Have a look at one of his repair jobs at :
http://johno.myiglou.com/steammain.html.
Look under the Doll section at the Doll 360. His main page can be found in my links section.
I have a Mamod Minor 2 engine in a bad way. The chimney was loose and had been fixed on with Pratly putty. The steam tube was leaking and had been fixed on with metal putty. The base and boiler mount was badly scratched and rusted. The piston was badly worn and would not hold a pressure seal. I had to replace the piston and piston block.
Go to the videos page to see a clip of the restored model running.
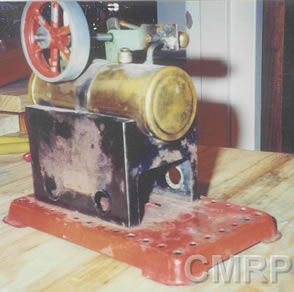
The Engine before starting repairs. Here you can see the rust on the firebox and the stains on the boiler.
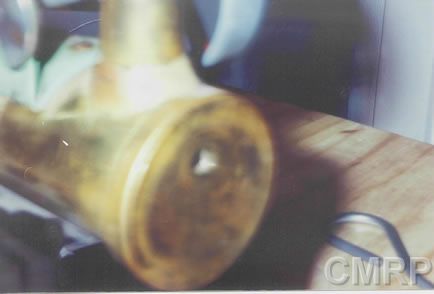
This is a bad shot, but you can see the putty holding the chimney upright, as the rivet was loose. You can also see the stains on the boiler.
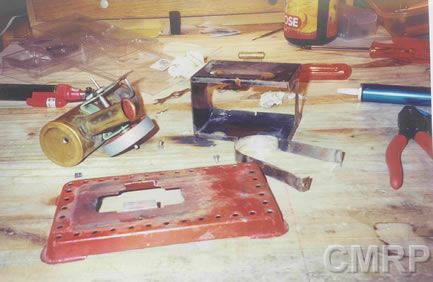
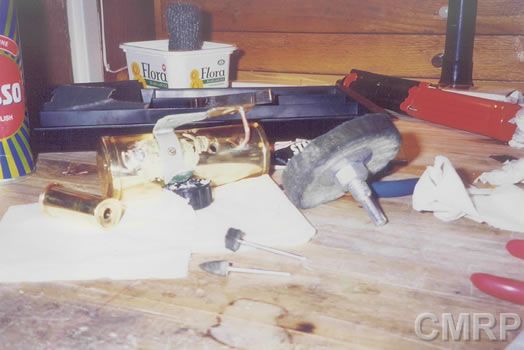
Some shots of the disassembled engine before starting repairs.
DRILLING
The chimney had to be removed. It was held on with a loose brass rivet and Pratley putty. I broke away the putty and drilled out the rivet. The other half of the rivet drops down into the boiler. I spent the next hour shaking the boiler to try to get the other half of the rivet out of the filler hole!
I purchased a small butane torch to affect the solder repairs. After frustrating myself to no end of trying to get the steam pipe to come off, I realized that this was not solder, but steel putty. I had to carefully file off the putty around the pipe and boiler.
The flywheel and piston mount was riveted to the boiler in the same way as the chimney. I decided the leave it on, as the green paint was in good condition and would be fine with a light polishing. If I took it off, I would have to take off one of the boiler ends to get it back on.
The flywheel needed repainting, but it was glued to the shaft. I eventually got it off using my butane torch.
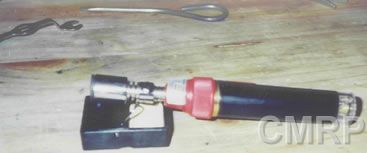
It has a nice attachment that turns it into a
heat gun, the attachment has a ceramic grid in it that glows red under the
flame, you extinguish the flame once it is red and the butane gas is heated once
it flows past the red hot ceramic grid. Pretty cool, or hot should I say.
I
heated up the flywheel boss and gave it a twist every now and then. Eventually this dark liquid came running out, which must have been the glue melting and it
came off easily.
I than drilled a hole into the boss and tapped out the hole to accept a Meccano screw.
PAINTING
I put the firebox, base and flywheel in caustic soda to remove the paint.
Once the paint was off, I masked off the flywheel and put primer on the flywheel and base. From there, I put on 3 coats of post office red.
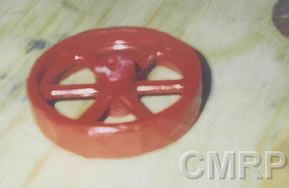
The flywheel with masking still on after respraying.
Once the base was dry, I realized that I should have given it a light sanding before spraying. I don't know why I did not give it a light sanding. I think I left it because I could see the rust marks on the cleaned piece, but if I ran my finger across them they were smooth and flush with the rest of the surface. I though that the primer would let the paint hide all the discoloring. Once sprayed, you could see the rust marks at certain angles in good lighting. The finish was O.K., so I did not bother to redo the piece.
I think the lesson there is, don't be lazy! If you can see rust, you WILL see it after spraying. Sand it now.
The firebox was sprayed with heat resistant black spray paint. There was a lot of raised, rough rust spots on the piece. I sanded the piece with 800 and then 1000 grit sandpaper until the piece was ready for spraying.
POLISHING
I was informed that this boiler is made from natural brass.
This
means that you can use fine abrasives on the boiler to remove stains and use
buffers to restore the surface, without destroying the original finish.
Some
engine makers, I am told, put an oxidized finish on the boilers, which makes minor
repairs difficult and obvious.
I purchased a 10cm diameter, 2cm face cotton buffing wheel, and some miniature Dremmel shaped polishing wheels.
With my drill clamped to the workbench I began polishing the
boiler.
I covered the flywheel mount with masking tape to protect the
paint.
I used Brasso copper polish with the wheels. The big wheel worked great at getting all the stains off. Because the flywheel mount was left on, I used the small polishers for the tight corners. Be careful though. The small polishers tend to leave polishing marks.
I polished the green paint with one of those automotive paint restoring products you see on Advert TV all the time. I used Diamond Guard which worked great at taking the stains off the paint.